Dify中的SSRF_PROXY服务
本文使用Dify v1.5.0版本,主要介绍了Dify中的SSRF_PROXY。为什么需要SSRF_PROXY,可参考Dify官方文档的FAQ[2]。简单理解,为了防止SSRF(服务器端请求伪造)。
一.ssrf_proxy服务
1.ssrf_proxy配置
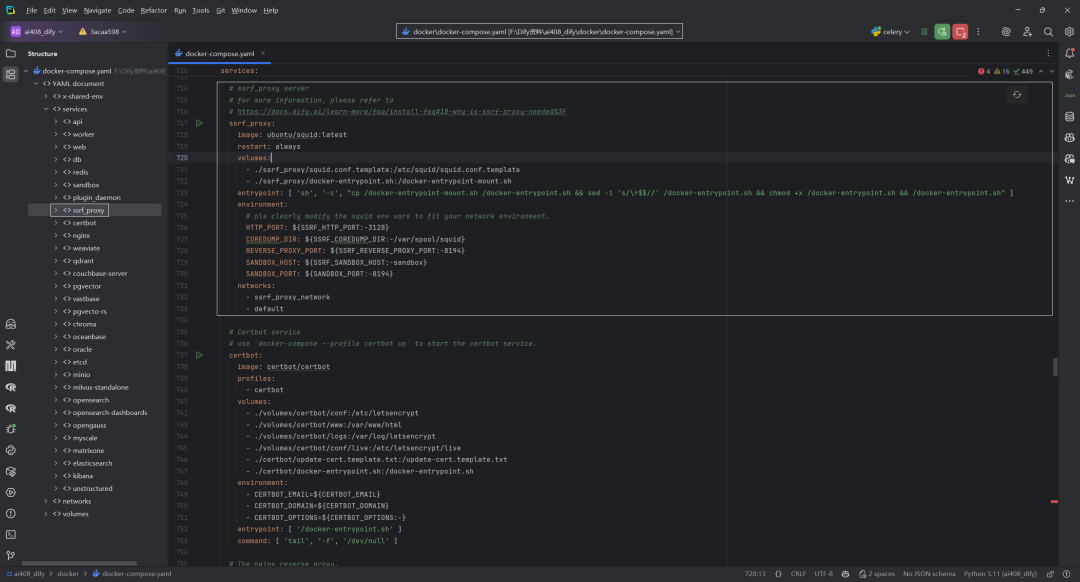
文件位置:dify/docker/docker-compose.yaml
`# ssrf_proxy server
for more information, please refer to
https://docs.dify.ai/learn-more/faq/install-faq#18-why-is-ssrf-proxy-needed%3F
ssrf_proxy:
image: ubuntu/squid:latest
restart: always
volumes:
- ./ssrf_proxy/squid.conf.template:/etc/squid/squid.conf.template
- ./ssrf_proxy/docker-entrypoint.sh:/docker-entrypoint-mount.sh
entrypoint: [ 'sh', '-c', "cp /docker-entrypoint-mount.sh /docker-entrypoint.sh && sed -i 's/\r$$//' /docker-entrypoint.sh && chmod +x /docker-entrypoint.sh && /docker-entrypoint.sh" ]
environment:
pls clearly modify the squid env vars to fit your network environment.
HTTP_PORT: ${SSRF_HTTP_PORT:-3128}
COREDUMP_DIR: ${SSRF_COREDUMP_DIR:-/var/spool/squid}
REVERSE_PROXY_PORT: ${SSRF_REVERSE_PROXY_PORT:-8194}
SANDBOX_HOST: ${SSRF_SANDBOX_HOST:-sandbox}
SANDBOX_PORT: ${SANDBOX_PORT:-8194}
networks:
- ssrf_proxy_network
- default
`
下面解析这段 docker-compose.yml 片段,说明每个字段在 Dify 的 ssrf_proxy 服务中扮演的角色。
| 配置字段 | 解释 |
|---|---|
| ssrf_proxy: | 定义一个名为 ssrf_proxy 的服务,用于防止 SSRF(服务器端请求伪造)。Dify 通过把所有外部 HTTP 请求转发到一个受控的 Squid 代理来削弱风险。 |
| image: ubuntu/squid:latest | 选用官方 Squid 代理在 Ubuntu 基础镜像上的最新版本。Squid 天然支持 ACL、速率限制、日志等功能,适合作为安全代理。 |
| restart: always | 若容器异常退出,Docker 会自动重启,保证代理始终可用。 |
| volumes: | 挂载两类文件:① ./ssrf_proxy/squid.conf.template → /etc/squid/squid.conf.template:自定义 ACL/白名单/端口规则;② ./ssrf_proxy/docker-entrypoint.sh → /docker-entrypoint-mount.sh:自定义启动脚本。 |
| entrypoint: | 运行一段 shell 命令 替换默认 entrypoint.sh:1.把挂载的脚本复制为真正入口;2.删除 Windows 换行(\r);3.加可执行权限;4.执行脚本。该脚本通常会把模板渲染为最终 squid.conf 并启动 Squid。 |
| environment: | 提供 可环境化的模板变量,由 docker-entrypoint.sh 注入进 squid.conf:1.HTTP_PORT — Squid 对外监听端口 (默认 3128);2.COREDUMP_DIR — Squid 转储目录;3.REVERSE_PROXY_PORT — 需要反向代理到 sandbox 的端口 (默认 8194),用于把请求安全回送沙箱;4.SANDBOX_HOST & SANDBOX_PORT — 沙箱容器及其端口;所有值都支持 ${VAR:-default} 语法,可在 .env 覆盖。 |
| networks: | 把 ssrf_proxy 同时连接到:1.ssrf_proxy_network — 仅供代理与 sandbox / plugin_daemon 等内部组件通信;2.default — 让 API、Worker 等能通过容器名 ssrf_proxy:3128 访问代理。 |
(1)API/Worker/插件 需要访问外网 → 强制设定 HTTP_PROXY=http://ssrf_proxy:3128;
(2)请求进入Squid,根据在squid.conf.template定义的ACL白名单与带宽/请求大小限制决定是否放行;
(3)如需内部回调(例如访问sandbox:8194执行沙箱代码),Squid利用SANDBOX_HOST与 REVERSE_PROXY_PORT 转发;
(4)合规流量被转发、记录,非法或超限流量被拒绝或限速。
这样即可在 不修改应用代码 的前提下,为所有外部 HTTP 调用加上统一的 SSRF 防护和流量治理层。
2.ssrf_proxy网络
当一个服务同时连接到ssrf_proxy_network和default网络时,实现了两种不同的网络通信能力,这是一种平衡安全性和可访问性的架构设计。
`networks:
create a network between sandbox, api, worker and ssrf_proxy, and can not access outside.
ssrf_proxy_network:
driver:bridge
internal:true
`
(1)内部安全通信
通过ssrf_proxy_network网络,该服务可以与其它连接到这个网络的服务(如sandbox、api、worker或ssrf_proxy)进行安全通信。
- 这是一个
internal: true的网络,确保这些通信不会访问外网 - 主要用于需要安全隔离的服务间通信
(2)外部网络访问
通过default网络(默认网络,无需创建),服务可访问互联网,与其它连接到default网络但没有连接到ssrf_proxy_network的服务通信。
3.ssrf_proxy环境变量
文件位置:dify\docker\.env
SSRF是一种安全漏洞,通过这个代理可以防止恶意请求访问内部资源。配置SSRF(服务器端请求伪造)代理的环境变量部分,如下所示:
SSRF_HTTP_PORT=3128:设置SSRF代理的HTTP端口为3128(常见的Squid代理默认端口)SSRF_COREDUMP_DIR=/var/spool/squid:指定Squid代理的核心转储文件存储目录SSRF_REVERSE_PROXY_PORT=8194:设置反向代理的端口号SSRF_SANDBOX_HOST=sandbox:指定沙箱环境的主机名SSRF_DEFAULT_TIME_OUT=5:设置默认的总体超时时间为5秒SSRF_DEFAULT_CONNECT_TIME_OUT=5:设置连接超时时间为5秒SSRF_DEFAULT_READ_TIME_OUT=5:设置读取超时时间为5秒SSRF_DEFAULT_WRITE_TIME_OUT=5:设置写入超时时间为5秒
这些配置主要用于控制代理服务器的行为和性能,同时提供安全保护,防止通过应用程序访问未授权的内部资源。
二.squid.conf.template配置文件解析
文件位置:dify/docker/ssrf_proxy/squid.conf.template
`acllocalnetsrc0.0.0.1-0.255.255.255# RFC 1122 "this" network (LAN)
acllocalnetsrc10.0.0.0/8# RFC 1918 local private network (LAN)
acllocalnetsrc100.64.0.0/10# RFC 6598 shared address space (CGN)
acllocalnetsrc169.254.0.0/16# RFC 3927 link-local (directly plugged) machines
acllocalnetsrc172.16.0.0/12# RFC 1918 local private network (LAN)
acllocalnetsrc192.168.0.0/16# RFC 1918 local private network (LAN)
acllocalnetsrcfc00::/7# RFC 4193 local private network range
acllocalnetsrcfe80::/10# RFC 4291 link-local (directly plugged) machines
aclSSL_portsport443
acl SSL_ports port 1025-65535 # Enable the configuration to resolve this issue: https://github.com/langgenius/dify/issues/12792
aclSafe_portsport80# http
aclSafe_portsport21# ftp
aclSafe_portsport443# https
aclSafe_portsport70# gopher
aclSafe_portsport210# wais
aclSafe_portsport1025-65535# unregistered ports
aclSafe_portsport280# http-mgmt
aclSafe_portsport488# gss-http
aclSafe_portsport591# filemaker
aclSafe_portsport777# multiling http
aclCONNECTmethodCONNECT
aclallowed_domainsdstdomain.marketplace.dify.ai
http_accessallowallowed_domains
http_accessdeny!Safe_ports
http_accessdenyCONNECT!SSL_ports
http_accessallowlocalhostmanager
http_accessdenymanager
http_accessallowlocalhost
include/etc/squid/conf.d/*.conf
http_accessdenyall
################################## Proxy Server ################################
http_port${HTTP_PORT}
coredump_dir${COREDUMP_DIR}
refresh_pattern^ftp:144020%10080
refresh_pattern^gopher:14400%1440
refresh_pattern-i(/cgi-bin/|\?)00%0
refresh_pattern\/(Packages|Sources)(|.bz2|.gz|.xz)$00%0refresh-ims
refresh_pattern\/Release(|.gpg)$00%0refresh-ims
refresh_pattern\/InRelease$00%0refresh-ims
refresh_pattern\/(Translation-.*)(|.bz2|.gz|.xz)$00%0refresh-ims
refresh_pattern.020%4320
cache_dir ufs /var/spool/squid 100 16 256
upstream proxy, set to your own upstream proxy IP to avoid SSRF attacks
cache_peer 172.1.1.1 parent 3128 0 no-query no-digest no-netdb-exchange default
################################## Reverse Proxy To Sandbox ################################
http_port${REVERSE_PROXY_PORT}accelvhost
cache_peer${SANDBOX_HOST}parent${SANDBOX_PORT}0no-queryoriginserver
aclsrc_allsrcall
http_accessallowsrc_all
Unless the option's size is increased, an error will occur when uploading more than two files.
client_request_buffer_max_size100MB
`
1.网络访问控制列表(ACL)定义
(1)本地网络定义
acl localnet src 0.0.0.1-0.255.255.255# RFC 1122 "this" network (LAN) acl localnet src 10.0.0.0/8# RFC 1918 local private network (LAN) acl localnet src 100.64.0.0/10# RFC 6598 shared address space (CGN) acl localnet src 169.254.0.0/16# RFC 3927 link-local (directly plugged) machines acl localnet src 172.16.0.0/12# RFC 1918 local private network (LAN) acl localnet src 192.168.0.0/16# RFC 1918 local private network (LAN) acl localnet src fc00::/7# RFC 4193 local private network range acl localnet src fe80::/10# RFC 4291 link-local (directly plugged) machines
- 定义了
localnetACL,包含各种本地和私有网络IP范围 - 包括RFC标准定义的各种本地网络地址段和IPv6地址范围
(2)端口访问控制
`aclSSL_portsport443
acl SSL_ports port 1025-65535 # Enable the configuration to resolve this issue: https://github.com/langgenius/dify/issues/12792
aclSafe_portsport80# http
aclSafe_portsport21# ftp
aclSafe_portsport443# https
aclSafe_portsport70# gopher
aclSafe_portsport210# wais
aclSafe_portsport1025-65535# unregistered ports
aclSafe_portsport280# http-mgmt
aclSafe_portsport488# gss-http
aclSafe_portsport591# filemaker
aclSafe_portsport777# multiling http
`
- 第1行:定义
SSL_portsACL,允许443端口(HTTPS) - 第2行:被注释掉的配置,可解决GitHub issue #12792
- 第3-12行:定义
Safe_portsACL,列出所有允许访问的端口- 包括常见服务端口如80(HTTP)、21(FTP)等
- 包括非注册端口范围1025-65535
(3)其它ACL定义
acl CONNECT method CONNECT acl allowed_domains dstdomain .marketplace.dify.ai
- 定义CONNECT方法的ACL
- 定义允许访问的域名ACL(marketplace.dify.ai)
2.访问控制规则
http_access allow allowed_domains http_access deny !Safe_ports http_access deny CONNECT !SSL_ports http_access allow localhost manager http_access deny manager http_access allow localhost include /etc/squid/conf.d/*.conf http_access deny all
- 允许访问已定义的允许域名
- 拒绝访问非安全端口
- 拒绝CONNECT方法连接到非SSL端口
- 本地主机访问管理接口的规则
- 包含外部配置文件
- 最后拒绝所有其他访问请求
3.代理服务器配置
################################## Proxy Server ################################ http_port ${HTTP_PORT} coredump_dir ${COREDUMP_DIR} refresh_pattern ^ftp: 144020% 10080 refresh_pattern ^gopher: 14400% 1440 refresh_pattern -i (/cgi-bin/|\?) 00% 0 refresh_pattern \/(Packages|Sources)(|\.bz2|\.gz|\.xz)$ 00% 0 refresh-ims refresh_pattern \/Release(|\.gpg)$ 00% 0 refresh-ims refresh_pattern \/InRelease$ 00% 0 refresh-ims refresh_pattern \/(Translation-.*)(|\.bz2|\.gz|\.xz)$ 00% 0 refresh-ims refresh_pattern . 020% 4320
- 设置HTTP代理端口(使用环境变量)
- 设置核心转储目录
- 定义不同类型内容的缓存刷新模式
- 包括FTP、Gopher等协议的缓存策略
- 软件包相关文件的特殊缓存处理
4.注释掉的缓存配置
`# cache_dir ufs /var/spool/squid 100 16 256
upstream proxy, set to your own upstream proxy IP to avoid SSRF attacks
cache_peer 172.1.1.1 parent 3128 0 no-query no-digest no-netdb-exchange default
`
- 缓存目录配置(已注释)
- 上游代理设置(已注释),用于防止SSRF攻击
5.反向代理配置
这部分 Squid 配置设置了一个反向代理,用于连接到Sandbox环境。
################################## Reverse Proxy To Sandbox ################################ http_port ${REVERSE_PROXY_PORT} accel vhost cache_peer ${SANDBOX_HOST} parent ${SANDBOX_PORT} 0 no-query originserver acl src_all src all http_access allow src_all
(1)http_port ${REVERSE_PROXY_PORT} accel vhost 配置
- 设置 Squid 在
${REVERSE_PROXY_PORT}环境变量指定的端口上监听 accel表示启用加速器/反向代理模式vhost启用虚拟主机支持,允许处理多个域名的请求
(2)cache_peer ${SANDBOX_HOST} parent ${SANDBOX_PORT} 0 no-query originserver 配置:
- 定义 Squid 应该将请求转发到哪里
${SANDBOX_HOST}是沙盒服务器的主机名/IPparent表示 Squid 与目标服务器的关系类型${SANDBOX_PORT}是沙盒服务器的端口号0表示 ICP 端口(0 表示不使用 ICP)no-query禁用对此缓存对等体的 ICP 查询originserver表示此对等体是原始服务器(非缓存)
这个配置使 Squid 作为反向代理,接收来自 ${REVERSE_PROXY_PORT} 的请求并将其转发到 ${SANDBOX_HOST}:${SANDBOX_PORT}的沙盒服务器。
(3)acl src_all src all和http_access allow src_all
创建了一个名为 src_all 的访问控制列表(ACL),该列表匹配所有来源IP地址。src all 表示匹配任何客户端IP地址。允许上面定义的 src_all ACL中的所有IP地址访问代理服务器。
注解:
配置的组合效果是:允许来自任何IP地址的请求通过这个Squid代理服务器。在反向代理到沙盒环境的配置部分中,这意味着所有客户端请求都将被允许转发到定义的沙盒服务器。这是一个非常开放的配置,通常用于内部网络或受控环境中。在生产环境中应谨慎使用,除非有其它安全措施限制对代理服务器的访问。
6.其它设置
增加客户端请求缓冲区大小到100MB,避免上传多文件时出错。
# Unless the option's size is increased, an error will occur when uploading more than two files. client_request_buffer_max_size 100 MB
三.docker-entrypoint.sh脚本文件解析
文件位置:dify/docker/ssrf_proxy/docker-entrypoint.sh
该 bash 脚本是 Docker 容器的入口点脚本,用于配置和启动 Squid 代理服务器,专门用作 SSRF 代理。
`#!/bin/bash
Modified based on Squid OCI image entrypoint
This entrypoint aims to forward the squid logs to stdout to assist users of
common container related tooling (e.g., kubernetes, docker-compose, etc) to
access the service logs.
Moreover, it invokes the squid binary, leaving all the desired parameters to
be provided by the "command" passed to the spawned container. If no command
is provided by the user, the default behavior (as per the CMD statement in
the Dockerfile) will be to use Ubuntu's default configuration [1] and run
squid with the "-NYC" options to mimic the behavior of the Ubuntu provided
systemd unit.
[1] The default configuration is changed in the Dockerfile to allow local
network connections. See the Dockerfile for further information.
echo"[ENTRYPOINT] re-create snakeoil self-signed certificate removed in the build process"
if [ ! -f /etc/ssl/private/ssl-cert-snakeoil.key ]; then
/usr/sbin/make-ssl-cert generate-default-snakeoil --force-overwrite > /dev/null 2>&1
fi
tail -F /var/log/squid/access.log 2>/dev/null &
tail -F /var/log/squid/error.log 2>/dev/null &
tail -F /var/log/squid/store.log 2>/dev/null &
tail -F /var/log/squid/cache.log 2>/dev/null &
Replace environment variables in the template and output to the squid.conf
echo"[ENTRYPOINT] replacing environment variables in the template"
awk '{
while(match($0, /\${[A-Za-z_][A-Za-z_0-9]*}/)) {
var = substr($0, RSTART+2, RLENGTH-3)
val = ENVIRON[var]
$0 = substr($0, 1, RSTART-1) val substr($0, RSTART+RLENGTH)
}
print
}' /etc/squid/squid.conf.template > /etc/squid/squid.conf
/usr/sbin/squid -Nz
echo"[ENTRYPOINT] starting squid"
/usr/sbin/squid -f /etc/squid/squid.conf -NYC 1
`
1.脚本目的与背景
脚本基于 Squid OCI 镜像入口点修改而来,主要功能:
(1)将 Squid 日志转发到标准输出,便于 Kubernetes、Docker Compose 等容器工具收集和查看日志
(2)启动 Squid 代理服务,允许通过容器命令传递参数
(3)如未提供自定义命令,则使用默认配置运行 Squid
2.执行流程
(1)生成自签名 SSL 证书
检查是否存在 SSL 证书,如果不存在则生成一个新的自签名证书,将输出重定向到 /dev/null。
echo "[ENTRYPOINT] re-create snakeoil self-signed certificate removed in the build process" if [ ! -f /etc/ssl/private/ssl-cert-snakeoil.key ]; then /usr/sbin/make-ssl-cert generate-default-snakeoil --force-overwrite > /dev/null 2>&1 fi
(2)设置日志转发
在后台启动多个 tail -F 命令,持续监控 Squid 的四个主要日志文件:
tail -F /var/log/squid/access.log 2>/dev/null & tail -F /var/log/squid/error.log 2>/dev/null & tail -F /var/log/squid/store.log 2>/dev/null & tail -F /var/log/squid/cache.log 2>/dev/null &
- 访问日志 (access.log)
- 错误日志 (error.log)
- 存储日志 (store.log)
- 缓存日志 (cache.log)
(3)配置文件处理
使用 awk 脚本处理 /etc/squid/squid.conf.template 模板文件:
# Replace environment variables in the template and output to the squid.conf echo"[ENTRYPOINT] replacing environment variables in the template" awk '{ while(match($0, /\${[A-Za-z_][A-Za-z_0-9]*}/)) { var = substr($0, RSTART+2, RLENGTH-3) val = ENVIRON[var] $0 = substr($0, 1, RSTART-1) val substr($0, RSTART+RLENGTH) } print }' /etc/squid/squid.conf.template > /etc/squid/squid.conf
- 查找所有形如
${VARIABLE_NAME}的环境变量引用 - 从环境中获取这些变量的实际值
- 将变量替换为实际值
- 输出处理后的配置到
/etc/squid/squid.conf
(4)初始化与启动Squid
/usr/sbin/squid -Nz echo "[ENTRYPOINT] starting squid" /usr/sbin/squid -f /etc/squid/squid.conf -NYC 1
- 使用
-Nz参数初始化 Squid 缓存目录 - 使用处理后的配置文件启动 Squid,带
-NYC参数:- N: 前台运行(不作为守护进程)
- Y: 使用名称查询功能
- C: 在控制台输出诊断信息
这个 SSRF 代理容器主要用于安全测试或作为安全防护层,通过 Squid 代理过滤和控制请求。
参考文献
[0] Dify中的SSRF_PROXY服务:https://z0yrmerhgi8.feishu.cn/wiki/DMjHw8cEMifutekFVyVcoKl1nfe
[1] https://github.com/langgenius/dify/blob/1.5.0/docker/docker-compose.yaml
[2] 为什么需要SSRF_PROXY:https://docs.dify.ai/zh-hans/learn-more/faq/install-faq
[3] Squid configuration directives:http://www.squid-cache.org/Doc/config/
[4] 什么是SSRF:https://portswigger.net/web-security/ssrf
知识星球:Dify源码剖析及答疑,Dify扩展系统源码,AI书籍课程|AI报告论文,公众号付费资料。加微信buxingtianxia21进NLP工程化资料群,以及Dify交流群。
(文:NLP工程化)
Dify中的SSRF_PROXY服务最先出现在每时AI。
相关文章